As the seasons change and the rains start to move in, you might be a little more aware of the potential waterproofing issues. This is especially true if you’re currently building a home of your dreams. Small leaks can be costly and hard to locate later on. You’d be surprised how hard it is to locate the source of a leak on a roof, and this often results in a blanket approach of waterproofing the entire surface – which is expensive.
Rather than living under a ticking expense time-bomb, here are our top things to look out for when waterproofing your roof, the first time.
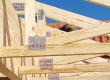
Get It Designed
There’s no better way to ensure your roof is waterproof than designing it properly. Over the years we’ve designed countless roofs. Using only the best software we can plot water flow off the roof. This all happens in the quotation stage – so way before any worker picks up a hammer.
A simple mistake we’ve seen happen is the installation of chimneys and skylights in high water flow areas, which can result in major leaks in the future. No matter how much sealant you apply to the mating surfaces later on, it will never be waterproof.
In the design stages, we will also identify waterproofing problems and work hand-in-hand with our clients to come up with the best solution.
Once this has all been completed, and everyone is happy, then we start manufacturing your trusses.
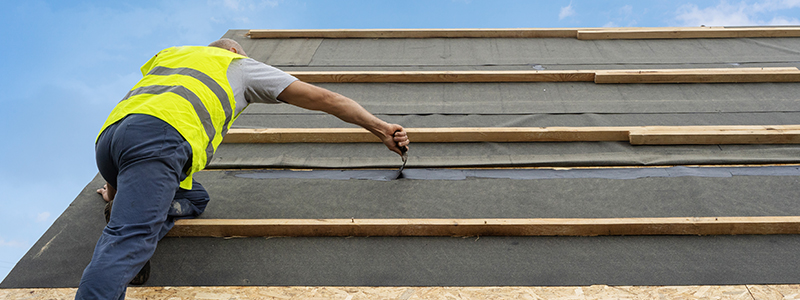
Don’t Let the Contractors Skimp on the Sheeting
We’re all guilty of cutting corners, but when it comes to erecting and waterproofing your roof, you might be setting yourself up for disaster. When your trusses have been installed correctly, make sure that your roofing experts install the roof sheeting with the correct screws and that they are all accompanied with washers. The washer is what actually seals the truss off from water. The overly ambitious can treat the contact points with roof meshing and sealant.
Also, good insulation and a proper seal will help reflect heat in summer and keep the cold out during winter. A major money saver in the future.
Roof Materials
If you are using tiles you want to make sure that the ridge is installed firmly with damp course underneath and evenly cemented into place, and that the tiles are laid out straight and that they interlock properly. The truss will need battens if the roof has a steep slope. Most tiles will have a lip that hooks into place. You might need to attach some of the tiles in place with adhesive, which will also help with waterproofing.
It’s important that you pair the truss and roofing material together properly. Whatever you choose, make sure there’s enough of a slope for drainage (which should be taken care of during the design process). If there are pools of water on your roof, it’s only a matter of time until it develops leaks.
Just so you know the basic pitch requirements, tiled roofs typically require a minimum pitch of 17.5 degrees while sheeted roofs can vary from 10 degrees, 5 degrees and even as low as 1 degree depending on the profile of sheeting used (IBR, Corrugated or the Clip-locking type).
Flat roofs, which we don’t really do, tend to develop leaks more often because of pooling.
Drainage and Flow
When designing your truss and installing your roof, it’s important to remember that there’s a need for drainage via the gutters. Poor drainage can mean that gutters overflow and will cause seepage in the walls – a nightmare situation. This could also lead to damp trusses, which can be treated with a waterproofing agent if needs be.
You can buy loads of after-market products to waterproof later, but be sure to use the correct flashings for Valleys, parapet walls etc. as primary waterproofing.
Reducing gutter widths will always cause a backup in the drainage system so always make sure the width remains one size throughout the gutter system, and bigger is always better for preventing blockages.
An alternative way of avoiding the situation above is to plan an overhanging roof and trusses.
As always, when building, its key that you lay the best foundation, and for roofs, the best foundation is the truss.